My husband came home from work on Friday with a bit of a head cold. He was making himself lunch and was looking for comfort food. Well, that got me to thinking about tonight’s dinner. I browsed my cookbooks and I found what I think would be the ultimate in comfort food. Turkey
Now, I’ll let you in on a little secret. Shhh! Things 1 and 2 are not the biggest fans of sloppy joes. No, I don’t know what’s the matter with them and yes, I have taken them to see the doctor. Apparently there’s no cure for their bad taste. J Anyway, I decided to keep tonight’s meal a secret up until the last minute – I was not in the mood for any grumbling. Besides, they don’t get to judge until they’ve tasted it. AND, Thing 2’s birthday is tomorrow and she put in a special birthday dinner request for salmon which I am quite happy to make. However, husband doesn’t like salmon. He eats it but it is most definitely NOT his favorite meal. So, he gets an awesome comfort food meal right up his alley before he has to eat salmon. That’s fair, right? Yep, that’s what I thought too.
Alright, let me tell you how this recipe worked out. This is the first recipe from Gourmet magazine that I’ve blogged about. Don’t get discouraged by the name and think you can’t make anything from this magazine because you’re not a gourmet chef. I mean really, I made sloppy joes on biscuits! Any magazine that gives you a recipe like that doesn’t have a single snooty card to play. But, like Food & Wine and Saveur, Gourmet does not provide nutrition information. So, if you are seriously watching your calorie, fat, sodium, carbohydrate intake, tread carefully and pay attention to ingredients. Anyway, this meal was actually pretty easy to prepare and came together without too much issue. I was actually pretty surprised! My first thought was that it was labor intensive but it really isn’t and I think it actually flows much better than a Rachael Ray 30-minute meal. Of course, it takes a bit longer than that but you won’t find yourself running around your kitchen like a chicken with your head cut off trying to pull everything together at the last minute. (Okay, so that’s a funny picture – a chicken with it’s head cut off running around your kitchen. Ha! Seriously, if that happened in my kitchen, I would leave the house.)
You’ll need about an hour or so to pull the whole thing together and let me tell you, it’s so totally worth it! The biscuits are the BOMB-Diggity! The sloppy joe meat is yummy, flavorful and packed with deliciousness. About sloppy joes, I mentioned above that Things 1 and 2 are not fans. Well, it’s not because I usually make Manwich®. We haven’t had that stuff in YEARS! Honestly, I found a great Rachael Ray recipe for sloppy joes a while ago and I usually make those. Yes, I know they don’t like it but husband and I do and sometimes, you just have to have a loose-meat sandwich! (Okay, trivia time – what television show is that from? Bonus question – what was the diner’s name?) Anyway, this recipe is excellent as well and will definitely be on my repeat list. And those biscuits? Oh yes, I can see them becoming staples up in this house. Ingredient wise – I used nonfat buttermilk and part-skim pre-shredded cheddar to help cut down on fat and we did not miss a thing. One other thing before I give you the recipes – I would not count on eating these sandwiches with your hands. These are definitely knife and fork sloppy joes. The biscuits, because they are FABULOUS, fall apart the way a good biscuit does and the sloppy joes are, well, sloppy, and the juices soak right into the biscuit. Again, knife and fork unless you plan on wearing a full-body bib and would prefer to wear your food rather than eat it. And, if that’s the case, don’t waste a perfectly delicious meal like this on wearing. This one’s worth eating. J
Anyway, here’s the recipe. Happy cooking, drinking and eating!

Serves 8
3 tablespoons olive oil
1 large onion, chopped
2 celery ribs, chopped
1 red bell pepper, chopped
4 cloves garlic, finely chopped
2 ½ lbs ground turkey (not labeled “all breast meat” – this will allow for more flavor in the dish. Look for turkey with at least 7% fat)
1 teaspoon salt
½ teaspoon black pepper
1 (28-32 oz can whole tomatoes in juice
½ cup ketchup
2 tablespoons molasses (not blackstrap)
2 tablespoons cider vinegar
1 ½ tablespoons Worcestershire sauce
1 ¼ teaspoons Tabasco
Cheddar Buttermilk Biscuits (recipe follows)
Heat oil in a wide 8-quart heavy pot over moderately high heat until hot but not smoking, then sauté onion, celery, bell pepper, and garlic, stirring occasionally, until golden, 10 to 12 minutes. Add turkey and sauté, stirring occasionally and breaking up large lumps with a wooden spoon, until meat is no longer pink, about 5 minutes. Stir in salt and pepper.


Purée tomatoes with juice, ketchup, molasses, vinegar, Worcestershire sauce, and Tabasco

Serve turkey sloppy joes on split cheddar buttermilk biscuits.
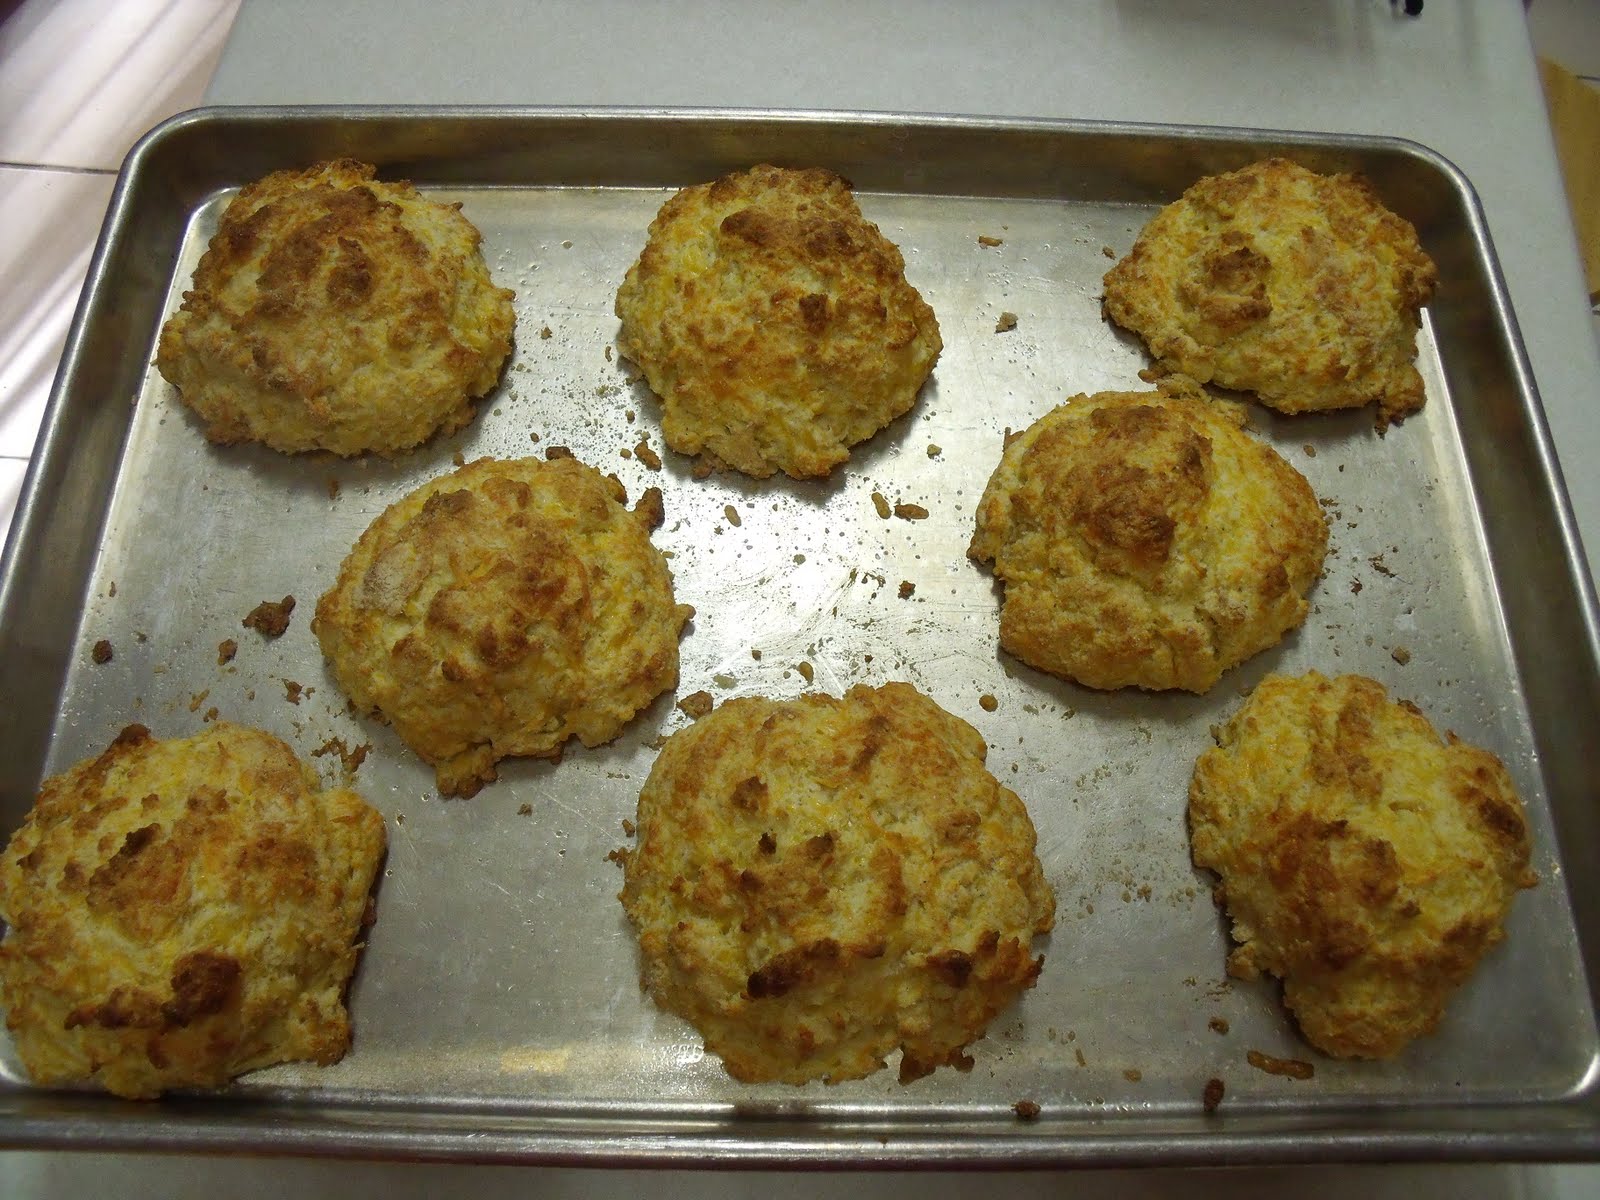
Cheddar Buttermilk Biscuits
Makes 8 biscuits
1 ¾ cups all-purpose flour
¾ cup cornmeal (preferable stone-ground; not coarse)
4 teaspoons baking powder
1 teaspoon baking soda
1 teaspoon salt
½ stick (1/4 cup) cold unsalted butter, cut into ½-inch cubes
6 oz extra-sharp cheddar, coarsely grated (2 cups)
3 tablespoons finely grated Parmigiano-Reggiano
3 scallions, finely chopped
1 1/3 cups well-shaken buttermilk
Put oven rack in middle position and preheat to 450 degrees. Butter 1 large baking sheet.
Whisk together flour, cornmeal, baking powder, baking soda and salt in a bowl, then blend in butter with your fingertips or a pastry blender until mixture resembles coarse meal. Stir in cheeses and scallions with a wooden spoon, then add buttermilk and stir until just combined.

Drop dough in 8 equal mounds about 2 inches apart on baking sheet. Bake until golden, about 15 minutes. Transfer to a rack and cool to warm, about 10 minutes, then cut in half horizontally.

Cooks’ notes:
You can use 2 small baking sheets instead of 1 large. Bake biscuits in upper and lower thirds of oven, switching position of sheets halfway through baking.
Biscuits can be made 1 day ahead and cooled completely, then kept in an airtight container at room temperature. Reheat in a preheated 350 degree oven 10 minutes.


