Monday, March 28, 2011

This ain't Grandma's mac and cheese....

There are days when good, old-fashioned mac and cheese, like Grandma used to make, is a necessary dish at the dinner table.  Now, my grandma never made homemade mac and cheese – neither did Mom, that I can remember – so, I didn’t know what I was missing until I tasted my husband’s grandma’s mac and cheese.  O. M. G.  I have never, ever tasted anything so delicious!  And honestly, I’m not a big mac and cheese person – I mean, I like it, but I don’t crave it or anything like that.  In fact, I was a bit leery when I first tasted hers because I’d never had homemade before.  Psht, boy was I way off!  So, of course, I asked her how she made it (Not right away, of course. I was too scared.  It was my first time meeting her and all and I was SUPER shy around the family.) and she said that she just made a white sauce, added cheese and macaroni and that was that.  Oh. Okay. Back then, I was thinking “um, what the heck is a white sauce?”  Ha!  Boy, have times and my cooking skills changed!  Anyway, I never did figure out the white sauce bit but I did get courage to try a few recipes.  None of them worked.  That blue box really can trap you with its processed cheesy goodness!  I mean, how do you top a day-glo orange side dish with a boring, tasteless, not orange “re-creation”?

Well folks, have I got news for you!  No, I didn’t figure out that white sauce but I did find an AWESOME blue box replacement!  Man oh man, was this version of mac and cheese good!  (Grant’s Mac and Cheese from the December 2006 issue of Food and Wine)  Smokey bacon-y goodness, tons of cheddar cheese and, because I used sharp paprika instead of sweet, a tiny little kick to help remind you that you’re alive. J  I should also let you know that this recipe is about as far from healthy as you can get.  I used regular bacon, whole milk – 6 cups! – and a little more than a pound of cheddar.  So, if you’re watching your diet, you might want to either skip this recipe or make your own healthy swaps.  I wanted to try it as written first to see if it was any good – AND IT WAS! – and next time I make it, I will definitely do what I can to lighten it up.  Also, please note that the recipe says it makes 8 servings.  Not completely sure how they’re measuring serving size but it filled a 9x13 pan and seriously made enough to feed a small army!  Those serving sizes must be based on GIANT appetites! J  I recommend shrinking the recipe unless you are actually serving 8 people with the mac and cheese as the main course, which of course would be a delicious meal accompanied by a light salad.  Otherwise, prepare for leftovers for the rest of your life.

I also decided to try another new recipe with the mac and cheese.  Hey, it was Sunday and I had time.  Besides, I like to experiment and surprise my family.  So, earlier in the week, I had asked the family what they wanted for dinner this week.  First thing out of my husband’s mouth?  Corn dogs.  First thing out of Thing 2’s mouth?  Salmon.  Boy, are their tastes different!  Well, the hubby was in luck – ok, I should state that I generally don’t eat corn dogs. They just look weird to me. – because I actually found a recipe for corn dogs that sounded pretty interesting and was guaranteed to NOT look like those corn dogs you get from the frozen section of the grocery store. (I’m sorry but those do NOT look or sound appetizing to me at all. I mean, what are all those ingredients in the breading?!)  So, corn dogs and mac and cheese it was for dinner.  That’s like a kid’s (and husband’s) dream come true!  And yes, the salmon will come this week too. J

Curly corn dogs from Food and Wine, August 2005 was the recipe I tried.  The hot dogs are quartered lengthwise, battered and then pan-fried – no sticks required.  Because they’re quartered lengthwise, they become long and skinny and that’s why they curl.  Very cute!  And, for someone who doesn’t eat corn dogs, they were actually pretty tasty!  And, I could identify all the ingredients in the breading.  Bonus!  Of course, with the mac and cheese, we were all pretty full but I didn’t make that many corn dogs so it was okay.  Definitely don’t recommend pairing those two dishes – it’s quite a bit of heavy food but again, it was Sunday and hey, you only live once. J

So, two winner recipes in one day!  Yay!  If you try the mac and cheese and lighten it up,  let me know how it goes – I’m interested to hear.  I’ll definitely be making it again, that’s for sure.  The blue box may never make its way into my pantry again……

Here are the recipes.  Happy cooking, eating and drinking!

Grant’s Mac and Cheese
Serves 8

1 tablespoon unsalted butter
6 thick slices bacon (6 ounces), cut into ½-inch dice
1 medium onion, minced
2 bay leaves
1 tablespoon sweet paprika
½ teaspoon cayenne pepper
1/3 cup all-purpose flour
6 cups whole milk
1 pound elbow macaroni
1 pound extra-sharp cheddar cheese, shredded (5 cups)
Salt

1.  Preheat the oven to 350 degrees.  Butter a 9-by-13-by-2 inch baking dish.  In a large saucepan, melt the butter.  Add the bacon and cook over moderate heat until crisp, about 7 minutes.  With a slotted spoon, transfer the bacon to a plate.

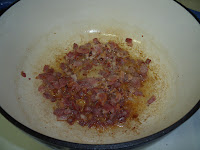
mmmm......bacon.....
2.  Add the onion and bay leaves to the saucepan and cook over moderate heat, stirring occasionally, until the onion is softened, about 5 minutes.  Add the paprika and cayenne and cook, stirring, until fragrant.  Stir in the flour until blended.  Gradually whisk in the milk until the sauce is smooth.  Bring to a boil over high heat, whisking constantly, and cook until thickened.  Reduce the heat to low and simmer the sauce gently for 30 minutes, whisking frequently.  Discard the bay leaves.

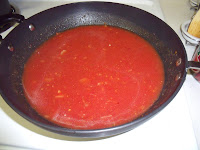
simmering away
3.  Meanwhile, bring a large pot of salted water to a boil over high heat.  Add the macaroni and boil until pliable but still undercooked, about 4 minutes.  Drain the macaroni and return it to the pot.

4.  Stir 4 cups of the cheddar into the hot sauce, add the bacon and season with salt.  Add the sauce to the macaroni and mix well.  Spread the mac and cheese in the baking dish and scatter the remaining 1 cup of cheddar on top.  Bake for about 30 minutes until golden brown and bubbling.  Let stand for 10 minutes before serving.

Yummy, cheesy goodness!
Make ahead:  The assembled mac and cheese can be refrigerated overnight.  Bring to room temperature before baking.

Curly Corn Dogs
Serves 8

1 1/3-cups fine cornmeal
2/3 cups all-purpose flour
2 ½ teaspoons baking powder
1 teaspoon salt
½ teaspoon freshly ground pepper
½ teaspoon onion powder
2 large eggs
1 ½ cups milk
¼ cup honey
Vegetable oil, for frying.
8 hot dogs, quartered lengthwise
Mustard, for serving

1.  Preheat the oven to 300 degrees.  In a large bowl, whisk together the cornmeal, flour, baking powder, salt, pepper and onion powder.  In another bowl, whisk the eggs, then whisk in the milk and honey.  Using a rubber spatula, fold the dry ingredients into the wet until just blended.  Let the batter stand for 15 minutes.

sleepy batter
2.  In a large, deep skillet, heat ½ inch of vegetable oil to 350 degrees.  Set a large rack over a large, rimmed baking sheet.  Dip 4 hot dog strips in the batter to coat, then slip them into the hot oil.  Fry over moderate heat until browned and crisp, about 2 minutes.  Transfer to the rack to drain; keep the corn dogs warm in the oven while you finish frying.  Repeat, frying up to 6 strips at a time.  Serve hot, with mustard.

so cute and curly!


Wednesday, March 23, 2011

Grill on fire! and then there was dinner....

Okay, it has been a crazy busy week so far. Big things happened on Monday. I got a great deal on some movie tickets from Groupon – if you haven’t heard of them, I highly suggest you check them out! What are you waiting for? Oh wait, read this first and then go check out Groupon for your area. Thanks. – Thing 1 got her learner’s license (LOOK OUT FLORIDA DRIVERS!!!) and … oh, yeah, I guess that’s it. But those are big – really BIG! And it was only Monday! Phew! Tuesday was the day for running around a chicken with my head cut off and today is Strep Throat day – guess Thing 2 felt she needed to outdo Thing 1’s flu. Thing 2 is my overachiever. Anyway, I actually tried a new recipe on Monday and, because we’ve been so busy, haven’t had time to tell you about it. And it’s really worth telling. So, a couple of sunsets later……

You know I love grilling. The other night, the grill caught fire – like, not on purpose. This is one of the downsides of a gas grill. If you don’t clean the drip pan and heating elements as often as you should, sometimes the drippings get REALLY fired up (ha!). Especially, if you turn the grill on to heat up and your ADD gets the better of you and you sort of forget to get back out there to turn it down to the actual temp you want. Anyway, we got the fire put out and cleaned the grill and I’ve been happily grilling since. No, my grilling privileges didn’t get revoked! Are you kidding? We might starve if that happened!! But that’s enough about my sometime forgetfulness. Back to the actual grilling of food.

We’ve had fabulous weather lately – okay, pretty much every day since we’ve been down here minus the one day we had severe thunderstorms and tornados…no, I didn’t grill that day – and I found a great recipe for chicken skewers. I love skewers. There’s something satisfying about food on a stick – why is that? Perhaps it reminds me of good times at fairs and amusement parks and being a kid? I don’t know and I don’t care. Skewers are fun. And this recipe, creatively called Sunset Chicken with Grilled Vegetable-Rice Pilaf (Cooking Light, May 1999) sounded really delicious and super easy. Actually, this is a great weeknight recipe for a busy parent. The chicken marinates for an hour according to the recipe but I see no reason that you can’t marinate the chicken for longer or even just 30 minutes. 30 minutes is enough time to get the flavors in. The rice takes 20 minutes and the chicken and veggies can grill while the rice is cooking. Very little chopping time and viola! You’ve just outdone Rachel Ray with a 20-minute meal! Woohoo! (okay, really, I’ve made some of her recipes and while they are yum-O, they usually require more than 30 minutes to accomplish. Hm….maybe I’ll test a new 30-minute meal soon and see how it works out.)

The chicken turned out really well but I think my personal favorite was the grilled vegetable-rice pilaf. Oh my goodness, it was so good! I can see this being just as tasty with a steak or a pork chop or pork tenderloin. Feel free to experiment! Here’s the recipe. Happy cooking, eating and drinking!

Sunset Chicken with Grilled Vegetable-Rice Pilaf

Marinade:
½ cup fresh lime juice (about 4 limes)
2 tablespoons hot sauce
3 garlic cloves, minced
6 (4-ounce) skinned, boned chicken breast halves – I used boneless, skinless because I didn’t want to deal with the skin and bones, worked out just fine! And the chicken got more of the seasoning.

Rice:
½ cup golden raisins
1 (16-ounce) can fat-free, less-sodium chicken broth
1 cup uncooked basmati or long-grain rice

Spice mix:
2 teaspoons chili powder
1 teaspoon ground cumin
¾ teaspoon salt
½ teaspoon black pepper

Remaining Ingredients:
1 large onion, cut into 12 wedges
1 cup (1-inch) pieces red bell pepper
1 cup (1-inch) pieces green bell pepper (I used orange because it was what I had)
Cooking spray
2 tablespoons chopped cashews
2 teaspoons olive oil

1. To prepare marinade, combine first 3 ingredients in a shallow dish, and add chicken, turning to coat. Cover and chill 1 hour. Drain; discard marinade.

2. To prepare rice, bring raisins and broth to a boil in a medium saucepan. Add rice. Cover, reduce heat. Simmer 20 minutes or until liquid is absorbed. Keep warm.

3. To prepare spice mix, combine chili powder, cumin, salt and black pepper in a small bowl. Rub 1 tablespoon spice mix over chicken. Combine remaining spice mix, onion and bell peppers in a bowl, tossing to coat. Thread vegetables alternately onto 3 (12-inch) skewers.

Ready for grilling!
4. Prepare grill. (Seriously, that’s all it says. So helpful. Medium heat is what I went for.)

5. Place kebabs and chicken on a grill rack coated with cooking spray; grill 7 minutes on each side or until chicken is done and vegetables are tender.

6. Remove the vegetables from the skewers. Combine cooked rice, vegetables, cashews, and oil in a large bowl; toss well. Serve with chicken.

Come and get it!
Yield: 6 servings (serving size: 1 chicken breast half and 1 cup pilaf)
Calories 348 (13% from fat); Fat 5.1g (sat 1g, mono 2.4g, poly 1g); Protein 30.4g; Carb 43.6g; Fiber 2.9g; Cholesterol 66mg; Iron 3.7mg; Sodium 415mg; Calcium 48mg

Thursday, March 17, 2011

The good news and the bad news.

Bad news.  Thing 1 is sick.  Headaches, weakness, scratchy throat, congestion, fatigue, cold shivers.  It all adds up to one thing.  The flu is in my house.  Whoopee.  Thank goodness there is also tea, Emergen-C and Theraflu too!  Oh, and Lysol, bleach, Clorox, hand-sanitizer and LOTS of soap!!  One of the best things for flu – besides rest and plenty of fluids – is chicken noodle soup.  Okay, now does chicken noodle soup REALLY have healing powers?  There are a few interesting articles out there that say yes – if you want to read them, here they are:  Does Chicken Soup have Healing Powers?;  The Healing Powers of Chicken Soup ; Science Finally Shows What Grandma Knew All Along .  Speaking from personal experience, chicken soup always makes me feel better – I think they may be right!  And, even sipping chicken BROTH can do the trick sometimes!  Seriously!  Of course, homemade chicken soup, made with love by a mother (or father – don’t want to discount the dad chefs out there!) taking care of her family, always wins.

Now, you know I had to come across a recipe for chicken soup in all my recipe browsing.  Of course I did!  A few, as a matter of fact - I had to narrow it down to one.  Tough job but it had to be done.  And, bonus, the recipe I chose sounded really delicious and looked very easy to make.  (Cooking Light magazine, either 2005 or 2006)  Okay, I’ll be honest here – I do have a penchant for recipes, especially soups, stews and chilis that take some time to cook.  I did find some recipes for 20-30 minute soups but, in my own opinion, there’s not enough time to put good flavor and the necessary love into a soup there.  So, I chose the one that required a little more time.  But, the time was not “busywork” and was definitely worth it.  The time was mostly roasting the vegetables and simmering the soup.  Wait, roasting the vegetables?  I know!  Sounds so interesting, doesn’t it?!  THAT’S why I selected the recipe.  I love slow-roasted veggies!  So yummy and sweet and flavorful!  (except for mushrooms – ick – this recipe called for them, feel free to use them, I left them out – cook’s prerogative – I love cook’s prerogative!)

Good news!  This soup turned out to be possibly the most fabulous chicken noodle soup I have ever made.  I may never try another recipe to replace it.  I don’t know if it was roasting the vegetables or what but the flavor was HUGE, not overly salty (I HATE salty soups!) and the vegetables and chicken were the perfect texture.  I’m actually looking forward to having soup tomorrow for lunch and I can see me doing a double recipe in the future (up to the noodle step) and freezing some for future dinners.  This soup, people, is a major keeper.  I’m totally excited about sharing this recipe with you and having the opportunity to make it again!  Hopefully, the medicinal properties will kick in and Thing 1 will be on the mend. J

Here’s the recipe.  Stay away from the flu.  Happy cooking, eating and drinking! 

Beautiful veggies! (pre-roast)
simmering

YUM!
Roasted Vegetable-Rosemary Chicken Soup

1 cup (1-inch) cubed carrot
1 cup (1-inch) cubed onion
1 cup coarsely chopped mushrooms
1 cup (1-inch) pieces celery
1 cup (1-inch) pieces red bell pepper
2 tablespoons extra virgin olive oil
1 cup water
2 tablespoons chopped fresh rosemary
¼ teaspoon salt
4 (14-ounce) cans fat-free, less-sodium chicken broth
2 garlic cloves, minced
1 pound skinless, boneless chicken breast, cut into ½-inch pieces
2 cups uncooked whole wheat rotini pasta

1.  Preheat oven to 375 degrees.

2.  Combine first 5 ingredients in a large bowl; drizzle with olive oil, and toss well to coat.  Arrange vegetable mixture in a single layer on a jelly-roll pan lined with foil.  Bake for 50 minutes or until browned, stirring occasionally.

3.  Combine water and next 5 ingredients (through chicken) in a large Dutch oven; bring to a boil.  Reduce heat, and simmer 30 minutes.  Add roasted vegetables; simmer 30 minutes.  Bring soup to a boil.  Add pasta; simmer 10 minutes, stirring occasionally. 

Yield: 8 servings (serving size: about 1 cup)

Calories 176 (25% from fat); Fat 4.8g (sat 0.8g, mono 3g, poly 0.7g); Protein 17.9g; Carb 15.5g; Fiber 2.3g; Cholesterol 33mg; Iron 1.5mg; Sodium 450mg; Calcium 45mg

Sunday, March 13, 2011

mmm, mmm, good!

A friend of mine – hi Carol! – posted on Facebook a couple of weeks ago about a soup  (navy bean and bacon) that she made and how awesome it was.  Well, it sounded pretty awesome to me – I mean, it has BACON in it!  I’ve never met a piece of bacon that I didn’t like.  So, of course, I asked her if she minded parting with the recipe.  I mean, it could have been a family recipe or an ancient Chinese secret or something and I wanted to be sure death wasn’t going to be involved with me getting the recipe.  And, I no longer live near her so we certainly couldn’t go to her house and distract her with something while I ransacked her kitchen looking for it.  Phew, no worries about that – she was more than willing to share.  And, strangely enough, she sent me a recipe that wasn’t for navy bean and bacon soup.  Aha!  Carol has some scientist in her and totally gets that recipes are just guides.  Love it!  Anyway, the recipe came from Epicurious.com and is actually Split Pea Soup with Bacon and Rosemary.  Okay, if you know me, you know I haven’t liked split pea soup since I was a kid.  It’s weird and it’s green and well….. split pea soup ranks right up there with Brussels sprouts and liver for me.  (*shudder*)  I’ve never once considered substituting a bean for a split pea – I mean, why would I?  But what a great idea!  And, did I mention it has bacon in it?

Of course, Carol sent along the changes/alterations she made to the recipe and how she made it.  This, folks, is awesome because, as I’ve said before, I don’t create recipes off the top of my head very well (Top Chef contender I am not) and this was destined to be a disaster if I had to “create”.  Even thinking about creating makes me nervous…. Padma and Tom and Gail would have a field day with me and I would be gone at the Quick Fire challenge (yes, I know they don’t eliminate there…that’s how I believe I would fare).  Immunity?  Ha!  Only cuz I’m up to date on my shots.  Anyway…..

I’m really nervous whenever I make things with dried beans.  I’ve only done it a few times and they’ve been what I would call acceptable but not successful recipes.  I’m always worried that the beans won’t be soft or flavorful or anything that they should be.  So, to help prevent that, I not only soaked the beans overnight, I also cooked them a bit PRIOR to starting the soup recipe.  Okay, honestly, they soaked from 7:00pm until noon the next day.  Overkill?  Maybe.  Don’t judge me.  I want my beans to be good.  Then, I drained and rinsed them, put them back in the pot, added 6 cups of water, and brought them to a boil, added a bit of salt, and simmered them for an hour.  Okay, fine, judge me.  Maybe you’re better with beans.  If you are and you know the secret on how to make them delicious every time, please share.  I’m sure it won’t just be me that’s grateful.

So, from this point, I pretty much followed the recipe on Epicurious.com but changed it a teeny bit – even from Carol’s suggestions – and got the soup on.  Finished product?  It was DELICIOUS!!!  And I served it up in the husband’s granny’s old Campbell’s soup bean pot.  A lovely, warm and homey soup in the perfect, warm, memory-filled old container.  Can’t get much better than that.  Oh wait, we ate outside on the back patio (Florida room) on our new patio set.  Yep, that certainly did make it better.  Oh, did I mention there’s a golf course?  And people were golfing?  Ahhhh…….  Okay, sorry, that’s not fair if you’re in an un-temperate climate right now.  Sorry.  Back to the soup – it was SO GOOD that Thing 1 had seconds and Thing 2 had huge firsts and said it was really good.  She also said she felt like she should be eating it while she was sick.  Best kind of soup ever – the kind that makes you feel better just thinking about it.  WIN!

Alright, here’s what I did to it to make it mine.  Please make it yours.  I promise it’s worth it.  Trust me – TEENAGERS liked it.  J  Happy cooking, eating and drinking!

mmmm.....bacon.....

bright, fresh veggies


simmering away


soup with puree added

the perfect serving vessel

Navy Bean Soup with Bacon and Rosemary

5 slices bacon, chopped
1 small onion, chopped
1 bunch green onions, white and green parts, sliced (recipe called for a medium leek (white and pale green parts only) sliced but my store was out of leeks)
1 large carrot, peeled, chopped
3 garlic cloves, minced (honestly, I held back.  I LOVE garlic.  But 3 works really well.)
4 14 ½ ounce cans low-sodium chicken broth
16 oz dried Navy Beans, soaked overnight and pre-cooked, if you desire
2 bay leaves
½ teaspoon chopped fresh rosemary
Salt and pepper

  1. Saute bacon in heavy large dutch oven over medium-high heat until crisp and brown.  Add onions, leek (if used), carrot and garlic and sauté until vegetables begin to soften, about 6 minutes.  Add broth, beans, bay leaves and rosemary and bring soup to boil.  Reduce heat to medium-low, cover and cook until beans are tender, stirring occasionally about 1 ½ hours.  Taste soup while cooking and season with salt and pepper as desired.
  2. Put about 3 cups bean mixture into blender and puree.  Return puree to soup pot, heat and adjust seasonings as necessary.  (If you have an immersion blender, now would be a great time to use it!  I don’t presently but will have one by the end of this week.  And, you can certainly puree more or less according to your tastes.  I did about 3 cups because I found a bean soup recipe that recommended that amount and it sounded good to me.  Thickened the soup nicely but didn’t make it like baby food.)
  3. Serve with crusty bread perfect for dipping and ENJOY!

Tuesday, March 8, 2011

The paths to happiness are often closed.....

Remember a few weeks ago when I said that I love wine – and I mean REALLY love wine?  Well, I do – it wasn’t a lie although I know I haven’t talked about wine at all since then.  Well, today is the day for me to talk about wine – a new one we tried tonight (*gasp* on a Tuesday?! Yep, on FAT Tuesday, thankyouverymuch!).  So anyway, I forgot to add to my “things I’m reading now” list the Wine Lover’s Devotional by Jonathon Alsop– I’m sort of reading it…when I can remember that I’m reading it and I’m not still going through all those cooking magazines I have stockpiled.  So anyway, I was reading the Devotional this morning – trying to catch up with lost time – and I came across a recipe.  A recipe!!!  In a wine book!!!  I was beside myself with excitement – especially since the recipe I found went really well with the spaghetti I was planning for dinner!  It was like FATE – food fate!! 

Of course I decided to make the recipe – Oven-Roasted Tomato Sauce – and, well, would it surprise you to know that I felt the need to go in search of the recommended wine pairing?  Of course not!  And, if you were surprised, you haven’t been paying attention.  Anyway, I was really excited because, not only did I get to try a new recipe, I got to go check out the cute little wine boutique down in Pensacola – okay, fine, I’ve been saying I live in Florida and I do, but the area I live in is referred to as lower Alabama.  It’s pretty country without all the hayseeds.  But, my neighbors do have a pony – one of those mini Shetlands or something like that.  But I digress. 

Off I went in search of the cute wine boutique (and search I did!  You see, there's all kinds of construction going on in downtown Pensacola and all the roads that my GPS was telling me to turn on were closed!  I was so disappointed that I thought I might cry!  Instead, I found a parking lot, pulled in and called for help.  Directions followed - AHA, not ALL roads were closed and away I went!) – Aragon Wine Market for those that live in this area – and I was NOT disappointed.  They have some seriously awesome selections and I totally salivated at the window of the room where the really high-end wines were housed.  I was tempted to go in but I’m on a budget.  Okay, I bought 4 bottles (she totally twisted my arm on the 4th I was only planning on 3 bottles but….okay, my arm was starting to twist before she opened her mouth – I was definitely an easy mark and it was Robert Foley wine…I would have been silly to walk away).  Unfortunately, I didn’t find the one I was specifically looking for – the one that was recommended as a pairing for the tomato sauce, a Taurino Notarpanaro from Puglia, Italy– so I used my trusty phone and internet connection and looked up the descriptor of the wine (smoke and wood flavors, with essence of rich, ripe figs and plums) and tried to find something comparable.  Now, not knowing a whole bunch about Italian wines put me at a slight disadvantage but the bonus of small wine boutiques is that the proprietress usually knows LOADS about the wine she carries and can answer many questions.  So, after careful consideration, I decided to bring home a La Lus 2007 da uve Albarossa. 


The Albarossa is a new varietal grape – a hybrid of the Nebbiolo and the Barbera.  The Nebbiolo brings structure and the Barbera brings bouquet, which is winespeak for aroma and flavor.  I made a great choice!  This is a FABULOUS wine!  It was $27 which isn’t inexpensive by any stretch but for a wine this delicious, it’s a pretty darn good price because I’ve tasted other wines just as delicious that retailed at more than $50 a bottle.  Comparatively, this wine is quite reasonably priced.  The Albarossa has a lovely, deep ruby color and smells of cherry and possibly blackberry fruit (okay, I have a little cold and my sniffer is a little stuffed) and smoke and licorice.  I also thought that it smelled of jam – like when you first open a jam jar.  My husband thought it smelled great, smooth, slightly fruity.  I swirled the wine in the glass – this opens up the smells – and offered it to both Things 1 and 2 for a sniff to get their opinions.  No, they didn’t taste – they are just wine sniffers.  J  Thing 2, who has a slightly more sophisticated sense of smell, thought it smelled like a grape Warhead.  I went back for a sniff and totally smelled grape soda!  I love getting other opinions!  How did I miss that before?  I think I was too busy trying to be clinical – don’t do that.  When you sniff a wine, do it for enjoyment.  We adults have too many things going on in our brains at times – sometimes you have to think like a child to really enjoy something.  It’s crazy, I know, but it’s true.

And, BONUS, the wine went spectacularly with my tomato sauce!  (phew!  Tomato sauce can be pretty acidic and it’s hard to match a wine to those flavors.)  I made meatballs alongside the sauce but didn’t throw them in while cooking – I wanted to try the sauce as the recipe called it to be made.  The sauce was delicious!  Oven-roasting the tomatoes really brings out a sweetness that you don’t get with a stove-top cooked sauce.  Yum!  I highly recommend that you give it a try whether you decide to try the wine or not.


Okay, here’s the recipe for the sauce.  Happy cooking, eating and drinking!

Oven-roasted Tomato Sauce

1 tablespoon olive oil
1 small onion, diced
7 garlic cloves, minced
1 can (12 ounces) artichoke hearts, drained
1/3 cup pitted black or green olives
1 can (28 ounces) Italian plum tomatoes
½ teaspoon salt
1 tablespoon sugar
1 tablespoon dried basil or 7 leaves fresh basil
½ cup dry white wine
¼ cup chopped fresh parsley, optional
¼ cup grated Asiago cheese (or other good hard, dry Italian cheese), optional (I used parmeggiano-reggiano)

Preheat the oven to 400 degrees.

Heat the olive oil over medium heat in a large cast-iron skillet or other oven-safe dish.  Add the onion and garlic, and cook slowly until the onion softens.

Turn up the heat to medium-high, and add the artichokes and olives.  Cook for 2 to 4 minutes, until the artichokes start to brown.  Add the tomatoes, salt, sugar, and basil.  Bring to a quick simmer, and cook for 5 minutes.  Break up the tomatoes by mashing them once or twice with a big fork or potato masher.

Add the wine to the skillet, stir once, then place in the oven to cook for 20 to 30 minutes.  Serve over bread, pasta, or risotto.  Top with parsley and Asiago cheese.

TIP: Watch your sauce in the oven.  If it starts to look too thick, add a little more white wine or a little water.  Also, feel free to experiment with the recipe by replacing the artichokes and olives with other favorite ingredients, such as eggplants and caper berries, or cannelloni beans and roasted peppers.

Served 6 to 8

Saturday, March 5, 2011

Why wait for birthdays? Celebrate the cake!

I love cake.  I especially love homemade cakes.  I really, really love making homemade cakes.  And, I am particular about frosting.  I’m a buttercream girl, not a powdered sugar heavy frosting girl.  If a frosting calls for a box or more of powdered sugar, I’m going to say no way!  Now, I have a friend that LOVES that sugary sweet frosting – you know who you are – and when we had birthday celebrations at work, I would eat the cake and she would eat the frosting – teamwork!  Anyway, I decided it was time for me to make a cake.  No reason – just because.  After all, didn’t Marie Antoinette say, “Let them eat cake!”?  Certainly she was talking about us and she didn’t say anything about needing a special occasion.  It’s Saturday – that’s pretty special, right?

I decided to make a red velvet cake.  I’ve never made one before and I’m intrigued by cakes that are red.  Remember the movie Steel Magnolias when the aunt made the groom’s cake?  That armadillo cake?  Gray frosting – really, GRAY! – and blood red cake.  It looked disgusting and awesome, all at the same time.   No, I didn’t make an armadillo cake.  Sorry to disappoint.  Get over it.

Okay, I’ll be honest.  I made a red velvet cake but I didn’t, at the same time.  You see, it calls for red food coloring.  I looked in my pantry and I found food coloring except…well…you see, I bought neon colors and red was not an option.  I chose purple.  Neon purple.  So, I made a purple velvet cake.  It looked AWESOME!  Purple is my favorite color.  Purple cake batter looks really odd and very cool and when it bakes, the cake gets a really deep hue, almost red in fact.  So, maybe I DID make a “red” velvet cake! 

It's purple!
I got the recipe from a March 1998 issue of Cooking Light.  Lots of cake recipes in that issue!  Guess that’s why I saved it.  This recipe included a recipe for a butter cream frosting and well, they had me at butter so I decided it was time to go for it.  Purple velvet cake with a homemade cooked butter cream frosting.  Yes, cooked.  It’s weird and I’ve never done it before.  Honestly, not sure I’ll do it again.  Maybe it was a 90s thing.  It wasn’t too hard to make but the consistency is really strange.  And, this frosting will not win any awards for beauty (in fact, it’s downright ugly) but it does taste good.  Okay, fine, I admit it – I lick the beaters.  I have to!  I think of it as my duty to ensure that what I am about to feed my family is indeed edible and safe for their consumption.  I lick the beaters out of LOVE. (buying it?)  And besides, ALL good chefs taste their food.  Don’t you people watch Top Chef?  Seriously, if Angelo had tasted his dish a couple of weeks ago and discovered that it was already salted enough, he wouldn’t have been sent him home for over-salting the dish and rendering it inedible.  So, definitely, definitely, definitely taste your food before you serve it – especially the desserts. :D

Ugly cake
In the end, my purple velvet cake was quite tasty!  It had its issues – the cakes didn’t want to come out of the pan without breaking – and yes, I used both cooking spray AND flour as directed (maybe use butter instead? Or just put parchment circles in the pans.) – and the frosting was too liquidy and pretty ugly.  Oh, side note, when you’re cooking the flour and milk for the frosting, it really does get thick all of a sudden.  I was whisking and whisking and whisking away and all of a sudden, it went from liquid to thickness.  Just like that.  Just a thought – if you decide to make this cake, start with the flour/milk part of the frosting before you start the cake.  This way, it has plenty of time to chill – that may be why my frosting ended up a little liquidy – maybe I didn’t let that mixture chill long enough.  Who knows?  


Anyway, I would consider my first attempt at red velvet cake a success.  And, the reviews from the family were two thumbs up all the way around.  Woot!  So, here’s the recipe.  Happy cooking, eating and drinking!

Red Velvet Cake

Cooking spray
1 tablespoon all-purpose flour
1 2/3 cup sugar
5 tablespoons vegetable shortening
1 large egg white
1 large egg
3 tablespoons unsweetened cocoa
1 (1-ounce) bottle red food coloring
2 ¼ cups all-purpose flour
1 teaspoon salt
1 cup low-fat buttermilk
1 ¼ teaspoons vanilla extract
1 tablespoon white vinegar
1 teaspoon baking soda
Cooked Buttercream Frosting

1.  Preheat oven to 350 degrees.

2.  Coat 2 (9-inch) round cake pans with cooking spray, and dust with 1 tablespoon flour.

3.  Beat the sugar and shortening at medium speed of a mixer 5 minutes or until well-blended.  Add egg white and egg; beat well.  Combine cocoa and food coloring in a small bowl; stir well with whisk.  Add to sugar mixture; mix well.

4.  Lightly spoon 2 ¼ cups flour into dry measuring cups; level with a knife.  Combine with salt.  Add flour mixture to sugar mixture alternately with buttermilk, beginning and ending with flour mixture.  Add vanilla; mix well.  Combine vinegar and baking soda in a small bowl; add to batter, mixing well.
            *side note – did you know that when you add vinegar to baking soda it bubbles and bubbles and acts like a volcano?!  I never built one of those as a kid so this was the coolest thing for me!  A science project in my kitchen!!  Okay, back to the recipe.

5.  Pour batter into prepared pans.  Sharply tap pans once on counter to remove air bubbles.  Bake at 350 degrees for 28 minutes or until a wooden pick inserted in center comes out clean.  Cool in pans 10 minutes; remove from pans.  Cool completely on wire racks.
6.  Place 1 cake layer on a plate; spread with 1/3 cup Cooked Buttercream Frosting, and top with another cake layer.  Spread the remaining frosting over the top and sides of the cake.  Store loosely covered in refrigerator.  Yield: 16 servings

Cooked Buttercream Frosting

1 cup fat-free milk
7 tablespoons all-purpose flour
12 tablespoons light butter, chilled
2 ½ cups powdered sugar
1 teaspoon vanilla extract

1.  Cook milk and flour in a small heavy saucepan over medium heat 2 ½ minutes or until very thick, stirring constantly with a whisk.  Spoon into a bowl; cover and chill thoroughly.

2.  Beat butter and chilled flour mixture at medium speed of a mixer until smooth.  Gradually add sugar, and beat just until blended (do not overbeat).  Stir in vanilla; cover and chill.  Yield: 2 1/3 cups

Calories 322 (24% from fat); Fat 8.7g (sat. 3.3g, mono 1.4g, poly 0.3g); Protein 4.9g; Carbohydrates 57.9g; Fiber 0.6g; Cholesterol 30mg; Iron 1.3mg; Sodium 310mg; Calcium 44mg

Wednesday, March 2, 2011

Please pass the fire extinguisher....

I love spicy food.  Really.  It makes my face turn red and I sweat and I might proclaim to be miserable but I LOVE spicy food.  I once made a dish entitled spicy chili-topped spicy chili burgers and it was SO HOT that we really couldn’t eat it.  It was pretty bad (and yet, it was good all at the same time).  Would you believe that once upon I time, I didn’t like spicy foods at all?  Guess my taste buds grew up – or maybe they grew cajones – who knows?  And besides, capsaicin, the naturally occurring chemical in hot peppers like cayenne, has been shown in studies to help boost metabolism and that’s pretty awesome in my book.  After all, I’m not a teenager any more and my metabolism could probably use a boost every now and then – and, if you’re a teenager and you’re reading this, COOL! Thanks for reading!  You should definitely try spicy foods to expand your tastebud horizons!  Go you for reading a blog about food!  (don’t make fun of me to your friends, please, thanks very much.)

So anyway, there’s an Italian restaurant that we used to go to before we moved to Florida that made a seriously spicy Shrimp Fra Diavolo.  Like, so spicy, it was actually on fire when it came to the table!  Okay, not really on fire but you get my drift.  Now, if you’re wondering, Fra Diavolo is Italian for Brother Devil.  Um, perhaps you should run now?  NO!  Don’t go!!  Please stay!

Anyway, I found a recipe for Shrimp Fra Diavolo that sounded like it needed to be made.  Now, you may be surprised where I got this recipe – it didn’t come from a magazine or a website.  Have you heard of Eat This, Not That?  Well, Dave Zinczenko and Matt Goulding made a cookbook called Cook This, Not That – cute, huh?  The premise behind the book is to offer you alternatives to your favorite, super-high calorie and high fat restaurant dishes.  Now, I’m all for learning how to make good choices with my diet – every little bit helps and if I can make a healthy change that helps my weight or blood pressure or cholesterol and can help my family make healthier choices, then I’m all for it.  Remember, knowledge is power! 

The shrimp was super easy to make and I didn’t have to buy anything for the recipe besides the shrimp – which is nice because I can really spend some money when I go to the grocery store and I’m pretty tired of spending all that money on food that I never get to.  (Apparently, that pack rat mentality I have with recipes and cooking magazines can also apply to groceries – who knew?!)  This also didn’t take very long to cook which makes it a terrific option after a long day – less than 30 minutes from start to finish! 

Okay, now for the spicy part – meee..OW! ;)  I was discussing the recipe with my husband and was referencing the super spicy dish from that restaurant and my exact words were, “it only calls for 2 teaspoons of red pepper flakes; it will not be anywhere near as spicy as Mama Roma’s” (Oh!  If you live in Maryland (Odenton, specifically), go there and eat – it’s FABULOUS!).  Well, yeah, 2 teaspoons of red pepper flakes really adds some heat – really.  My mouth was ON FIRE!  It was definitely NOT as spicy as Mama Roma’s (if you do go and you do order the Shrimp Fra Diavolo, consider yourself warned) but Things 1 and 2 were looking for the fire extinguisher, my husband was fanning himself and I ate nearly an entire baguette to combat the heat.  But, YUM!  Again, if you don’t like spicy food, this is NOT the dish for you – beware the Fra Diavolo!)

Here’s the recipe.  Happy cooking, eating and drinking!


Shrimp Fra Diavolo


¾ lb shrimp, peeled and deveined
Salt and black pepper to taste
½ tablespoon olive oil
2 teaspoons red pepper flakes
1 small onion, chopped
2 cloves garlic, minced
¼ teaspoon dried oregano or thyme
1 can (28-ounce) crushed tomatoes
1 cup dry white wine
8 ounces spaghetti
2 tablespoons chopped flat-leaf parsley

1.  Season the shrimp with salt and pepper.  Heat the oil in a large skillet or sauté pan over medium heat.  Add the shrimp and cook for 1 to 2 minutes, until just firm.  Remove to a plate.

2.  Add the pepper flakes, onion, garlic, and oregano to the pan; cook until the onions are soft.  Add the tomatoes and wine and simmer for 10-15 minutes.

3.  Meanwhile, cook the spaghetti according to the package instruction.  Drain and return to the pot.

4.  Season the sauce with salt and pepper.  Fold the cooked shrimp into the sauce.  Pour the pasta and toss.  Serve garnished with the parsley.

4 servings
470 calories, 8g Fat (1g saturated), 1,075mg sodium 
(sorry, that's all the nutrition info I got)